Archives

Organizing For Your Personality

Gears of BrainHave you ever wondered what type of personality you are and how it might affect your organizing strategies?  I have.  My curiosity inspired me to explore this subject in greater detail and during my exploration, I came across Deb Schwartz’ take on the subject (as found on RealSimple.com).  I share it with you here:

Whether you’re innately tidy or, um, not, find strategies tailored to how you think.

Left-Brained vs. Right-Brained

Order is individual. Some minds are built to create pristine stacks, and others have a natural urge to sprawl and display. We’ve all heard about left-brained and right-brained people and the different tendencies associated with each. A quick review:

  • Right-brain types are visually oriented. They tend to think in images rather than words, focus on the big picture rather than the details, and go through life in a somewhat seat-of-the-pants (a.k.a. scattered) way.
  • Left-brainers are those who think in words (attention, list makers!), do a lot of advance planning, and approach challenges in a rational, linear way.

So why not use this information when implementing order at home? It could be the solution to the endless search for the right organizing gear and offer relief from the disappointment (and cost) of failed attempts. “The key to successful organizing,” says Melissa Picheny, principal of a functional-design company in New York City (declutteranddesign.com), “is to pay attention to your personality. Then come up with a plan that conforms to it, rather than trying to work within someone else’s system.”

So, I ask you….how is your brain wired to work?  Are you a right-brainer or a left brainer (like me)?  Don’t know the answer…. CLICK HERE to take a simple quiz and find out.  You might be surprised like I was and the answer could help you define your organizing style.

~~~~~~~~~

So what did you learn?  Are you a right-brainer or left-brainer (like me)?  I would love to have you share your findings in the COMMENTS BELOW.

A Creative Way to Enhance Your Blog

Put Your Tribe to Work

Save Time Blogging:

Put your Tribe to Work for You

A Guest Post by Caylie Price

of Better Business Better Life


Do you ever sit down to write and think, “Heaven help me.. not again?”

Is your mind blank except for the booming voice “You’re not a writer…did you really think you could be a blogger…I can’t think of anything to write AARRRGGGGHHHHH.”

OR

Do you simply not have the time right now? Business is brusque, the kids are hungry, the day job wants you to work late, you’ve neglected the gym since 1984 and social life, what social life?

OR

BOTH?  And now you’re praying for a miracle to whisk you away to a tropical island.

Well, it’s time to get smarter.

It’s time to put your tribe to work for you!

So how does this work?

You need to learn how to be a content collator or aggregator and to effectively crowd source your content.

The simplest way is to post a series of links to great content your readers have written. Something along the lines of what Sarah from SillyGrrl.com does with her Blog Love series. Your readers will love you for it. I’m always on the lookout for the latest Blog Love post because I know there will be a bunch of amazing gems to dive into.

Imagine taking it to a whole other level though.

Say hello to Danny Iny from Firepole Marketing. This man is the master of setting his tribe to work.

Take January 2012 for example. Danny decided to run a contest for his readers called “Marketing That Works.

Readers wrote posts about anything from new technologies, to old-fashioned ideas made modern, to whole new theories – all ideas and techniques for great marketing.

The masterstroke?

“We’re going to be publishing one (finalist) post every weekday – that’s a post every weekday for four weeks.”

See that right there?

20 finalist posts published across a month. 20 posts that Danny and his team didn’t have to write. And 20 posts guaranteed to be heavily promoted by the finalists.

Nice work don’t you think?

To step it up a notch, in January 2013 Danny ran the “Awesome Engagement Contest”.

The rules…

“Each contestant had 5 days for their post to gain as much traction in the form of top-quality comments and social shares as possible. Overall, the contest generated over 70,000 words in the comment section, spread out between more than 800 comments, and posts were shared more than 800 times on Twitter, and another 1,400+ on Facebook.”

With fifteen finalists each having written a post published on Firepole Marketing and the social stats above, you might say it’s not too shabby.

You might argue that’s easy when there is $2,350 in the prize pool. Of course people will enter for that but you don’t have that sort of money to give away. Why am I wasting your time talking about this?

Well, you don’t have to be a big time blogger with cash to splash like Danny to get your readers to play ball.

If you have an e-course or other product why not offer free access for the finalists with a VIP upgrade for the winner.

Not only will it not cost you anything, but you can then also ask for testimonials from the recipients.

Or perhaps you can find a sponsor for your blog challenge or competition. If you already work with brands why not approach them to support your efforts – especially when they are more likely to get great exposure.

A little bit of creativity can get you ahead.

Time For Action

Now you’ve got a couple of very effective strategies to put your tribe to work, I want you to tell me  – have you tried a similar strategy before? What worked? What didn’t?

If this is all new, how can you apply these ideas to your blog? Identify the first step now and share your ideas in the comments below.

Caylie HeadshotCaylie Price, owner of Better Business Better Life , is currently working her way around the interwebs with her 21 day Blogging For Growth tour. She is also co-author of How To Host ASwingin’ Blog Challenge. Download the first chapter FREE to learn more.

PRODUCT TIP OF THE WEEK

This Week’s Product

is for both the Home & Office

As an organizer, I often use products that make not only my life easier, but my clients.  One product that has come in handy in both a business AND a home setting is my label maker; I don’t go anywhere without it!  This tool is like that of a hammer for a carpenter, a stethoscope for a doctor or a calculator for an accountant.  It is truly that important!

DSCN1325The label maker that I have used since I’ve been in the organizing business is Brother P-Touch Desktop Model PT 1290.  This is what it looks like.  Now this particular model has been upgraded (to Brother PT 2030) and you can find many other options that will fit your specific needs.


This is a highlight of what I love about this product:

          • can be used in both home & business applications
          • lightweight & portable
          • simple to use; easy to master
          • no software needed
          • has multiple formats & offers different framing options
          •  accommodates 2 rows of text
          • battery & AC operated

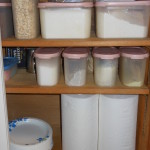
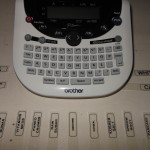
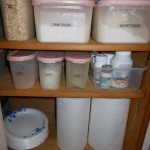
I could go on and on with more of the features, but the proof is in the pudding.  Take a look at a recent reorg I did in my own pantry cabinet.  Picture 1 is without labels; Picture 2 is the labeller with the labels; Picture 3 is with labels.  The containers are fine without the labels, but if left in that state, anyone who accesses the cabinet always has to take extra steps to figure out what’s inside.  With the labels – quick, easy identification of what’s inside.  The entire process took less than 30 minutes start to finish using my desktop labeller.  Definitely a step well worth the effort.

DSCN1239     DSCN1241    DSCN1249

Now you may be thinking, “I’m not an organizer, so why would I need label maker?”  The answer remains in understanding where a label maker can come in handy.  Check out this list:

Applications for label use:

Home

  • Kitchens (cabinet/drawer containerizing)
  • Linen Closets (shelf/item labelling)
  • Bathrooms (medicines, hygiene products)
  • Garage (tools)
  • Craft Rooms (product pieces)
  • Children’s Rooms (toys, school supplies, clothing)

Business

  • Files (Labels, tabs, drawer id)
  • Inventory Control (shelf id, product id)
  • Supplies (identification of sm. pieces)
  • Drawers (separation/management)
  • Notebooks (tabs, separators, title, spine)
  • Rolodex Files (title, separators)

Above are 6 suggestions for both home and office; now it’s your turn….look around your home or office and think about the many places you could use a label maker.  Where do you think you can find an application for a label?

Now check out the links listed above and choose one that will fit your needs and lifestyle and label away!  Send us some pics and let us know where you found an application – your project might just inspire someone else!

OFFICE MANAGING TIP OF THE WEEK

WHAT DO YOU DO WHEN YOU START A PROJECT?

How do you contain all your thoughts, ideas and the information that accumulates before the project even starts?  Where does all that paperwork go as the project moves to completion?  Also, how do you store it all and keep it easily accessible?  In our Managing Tip of The Week, we have a solution.

SOLUTION

As soon as a project is defined, choose one of three type of organizers to contain your information.  Base the decision on how long the project will be, how much info you expect to amass and whether that information will need to be updated. Here’s 3 options to choose from:

    • FILE FOLDER: Use if the project will be a quick, one-time event.  Label it immediately upon the scheduling of the project; feed paperwork into it and store in your project management container on top of your desk for easy access.
    • PROJECT FOLDER: Use if project will be short-term and have multiple areas of concentration needing tracking.  Label it immediately upon scheduling of project; contains 5+ pocket folders that can store small amounts of information.  Keeps everything easily accessible and provides portability; stores on desktop or in drawer nicely.
    • 3-RING BINDER: Use if project will be long-term, have multiple areas of concentration for tracking and need to update information frequently.  Customize the cover AND the binder at the beginning of the project to help keep it easily identifiable; organize the areas using Tab Separators.  Store on desktop, in file drawer or on bookshelf.

RESULT

All project information is well contained, can be updated as needed, looks professional and is easily stored for quick access when needed.

Never worry about where all that project information is EVER again ….once you’ve chosen which product to use, you have everything just where you need it when you need it.  Now tell us, how do you handle your project management information?

THE POWER OF AN ORGANIZED DESK: 3 Reasons You Can’t Live Without One (and how to get it!)

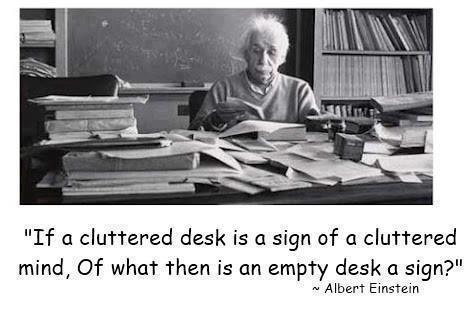
A cluttered desk is a cluttered mind.

Did you know that the above is the full version of the often used quote, “a cluttered desk is a cluttered mind”?  How you answer Mr. Einstein’s question?  I would answer, “An empty desk is a sign of someone ready to get something done!”  Are you that someone who is ready to get something done?  How about starting with organizing the hub of your business: your desk?  Desks seem to become cluttered right before our eyes with all of the paper, electronics and office paraphanelia that land on it every day.  You can easily organize that clutter by understanding why a clear desk matters and learning the 6 easy steps to clear it out.  Let’s get started by talking about the importance of a clear desk.

3 Reasons Why a Clear Desk Matters

Cluttered desks often thwart the productivity in an office and create unnecessary anxiety and stress.  Uncluttering a desk will not only unclutter one’s mind, it will also

  1. minimize resistance so you can focus on getting your work done
  2. help you work more efficiently (and you will get more done)
  3. help you free up time, energy, concentration and creativity

Overall, a clear desk can make your work more enjoyable and that gives you a productivity edge that makes work feel less like work.  Let’s move on to explore what supplies are needed to begin clearing the clutter.

Items Needed to Clear the Clutter

  • A large waste receptacle or plastic bags
  • Boxes with lids (Banker Boxes are ideal, but clear plastic bins with lids will work; in a pinch you can use laundry baskets or grocery/office supply boxes too)
  • Sticky notes (or paper & tape)
  • Writing Utensil

Steps to Clear the Clutter

  1. CLEAR A HOLDING AREA to house to where your removed items can be stored temporarily while you work on organizing your desk (can be a closet, wall/floor space, under the desk or area near office).
  2. LABEL, LABEL, LABEL: Label the boxes/bins in the following manner and place in the holding area:
    • Keep: all things that will stay in your office
    • Donate: anything that no longer has a use (or you don’t love) and is still in good working condition
    • Distribute: all things that have migrated to your desk, but belong in another room.
  3. SORT/PURGE or PURGE/SORT: Start at one end of the desk and remove each item: ask yourself what category should it go into: Keep, Toss, Donate, Distribute.  Place in appropriate box (or wastebasket/plastic bag if to be Tossed)
    NOTE: Minimize the number of things you keep on your desk; this is the optimal time to get rid of anything that will not support your goal towards efficient workflow.  Remember: simplicity will make your workspace feel less cluttered, thus making it easier to work freely and accomplish more.
  4. CATEGORIZE AS YOU GO: Group like items with like to make the categorizing stage go quicker and easier. (i.e., loose papers in one box, necessary items for daily workflow in another, items used on occassion, office supplies, notebooks, etc.)
  5. REMOVE EVERYTHING: Continue removing, purging and sorting until NOTHING is left on your desk.
  6. EMPTY THE BOXES & CLEAN IT OFF: Empty the boxes appropriately then clean the surface of your desk and any equipment left.

Fingers holding stop signTake a step back and look at what you have just accomplished.  YOU HAVE REACHED a clear desk.  Sit in your chair and revel in how it feels.  Stretch your arms out over your desk and touch the emptiness; breathe the space.  It’s pretty awesome, isn’t it?

When you are saturated with the feeling of accomplishment, SEND ME A COMMENT about how it feels – I’d love to hear your feedback.  If you have any questions, as always, feel free to drop me a direct note.

Check back for the next post in this organizing series that will help you understand the mindset shift needed to organize your desk and teach you about the categories needed to continue the process.

AN ORGANIZED OFFICE: Banish These 4 Stumbling Blocks to Clear the Way

Character adding a blockIn the organizing world, March has been tagged as Organize your Office month and today is National Organize Your Office DayThis day focuses on organizing one of the most stressful areas in a home or business: the office. 

What is your office like today – is it a jumbled mess that seems to grow exponentially while you sleep? Have you not even tried to tackle organizing it because you have found too many stumbling blocks preventing you from even getting started?  Be assured, you are not the only one experiencing this problem.Today, on this national day of recognition, let’s explore some of the stumbling blocks that are holding you back and banish them forever. 

I find the four most common blocks are: indecision about taking action, not having enough time, uncertainty about where to start and not knowing how to startHave you experienced any of these stumbling blocks?  The only way to overcome them is to work through each one, one block at a time.  Here’s what you can do.

DECIDE TO TAKE ACTION: Concentrate on the benefits

The hardest step to take is deciding to take action; living in indecision can be quite paralyzing.  This is what I remind people who are stuck at this stumbling block:  your indecision is costing you valuable time, energy, money and creating high stress levels.  Is that how you want to live your life?  Concentrate on the benefits you will receive with an organized office and you will be able move past the stumbling block as soon as you decide to take action.

DON’T HAVE ENOUGH TIME: Block out smaller chunks of time

You don’t need large blocks of time, but you DO have to commit to SOME blocks of time.  If you truly wish to move away from a disorganized space, commit to working on the project by blocking off time on your calendar.  You can block off 15 minutes a day, 30 minutes three times a week, a few hours once a week or a full day over the weekend. Make a commitment to improve your space using calendared blocks of time.

DON’T KNOW WHERE TO START: Break the project into small chunks

If this is a stumbling block for you, I recommend that you sit at a central point of the room (usually the desk) and look around.  Think about what areas cause the most inefficiency in your day (or what bothers you the most) and make a list of 4 areas that need work (prioritize them from worst to least).  This will break the BIG task down into smaller chunks, making it feel more manageable and will give you a focal point to get started.

DON’T KNOW HOW TO START: Follow our lead

You’ve already started by reading this blog post and our 3 week series on Organizing Your Office will guide you the rest of the way.  During the month of March, you will learn how to:

  • Clear out the Clutter (from your desk)
  • Set up a Paper Processing System
  • Choose a Desk that Meshes with Your Personal Working Style

So I challenge you:  Decide to take action today by remembering the benefits of organizing, make a commitment by blocking out time on your calendar and break the project into smaller chunks with a priority list.  Once you begin using these tools, you will quickly overcome your stumbling blocks, clear the way to an organized office and within a few, short weeks bring efficiency and productivity into your world.  

What will be the stumbling block YOU overcome today?  Leave us a reply and share your discovery with our readers.


ORGANIZE YOUR OFFICE: A Plan of Attack to Clear Your Desk

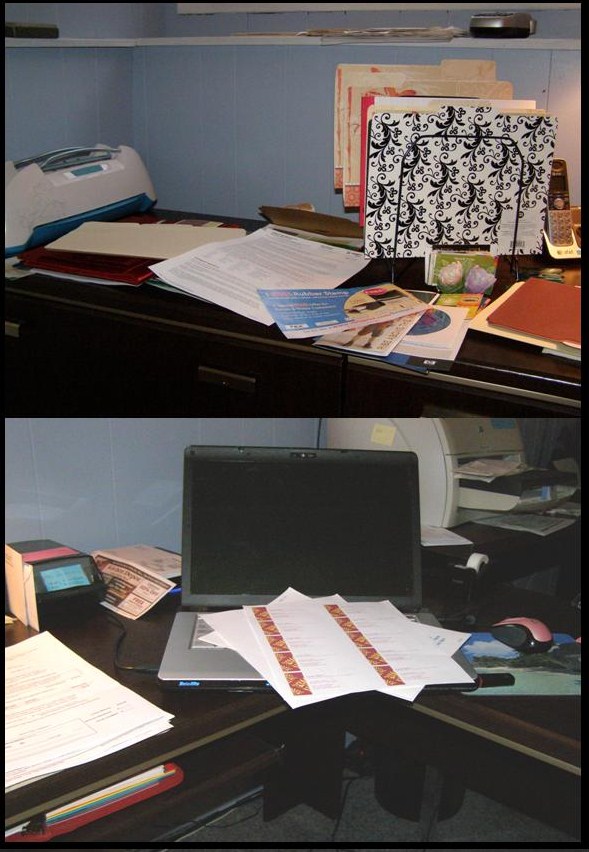
messy office deskMessy desks cause a huge amount of stress for many of us despite knowing that a clear desk indicates a clear mind.  We often get frustrated and overwhelmed just at the thought of trying to tackle clearing our desks.   A great way to decrease the stress of that frustration is to create a plan of attack; one that is clear and doesn’t take a lot of time.  Once there is a plan of attack in place, clearing that messy desk will be quick and easy.  Try some of these ideas to get started.

SCHEDULE TIME TO ORGANIZE: It’s important to make organizing a priority by scheduling time on your calendar.  Organizing a desk should take about 3-4 hours.  However, if your time is limited, you can break this block into smaller chunks.  Try putting aside 30 minutes each day for a week to tackle your project, making sure to block out the time on your calendar.   

STORE ONLY ESSENTIALS ON TOP OF YOUR DESK: Look objectively at the things on your desk; do you really need all of these things to function every day?  Go through each and every item and ask yourself this question.  Remove any items that you really don’t need to streamline what stays on top of your desk and free up space to work. 

KEEP ITEMS YOU USE DAILY WITHIN EASY REACH: Move the things you use each day to your writing side except the phone; items used less frequently and the phone should go to the opposite side.  This will enable you to keep things within fingertip reach and save you time.  The placement of the phone will allow you to take notes while talking and you can avoid having a corded phone cross your chest while holding the phone.

CREATE WORK ZONES: Create a zone for each of the tasks that you perform at your desk such as: communication zone with pads and pens; computer zone with discs and flash drives; time zone with calendar and clock; processing zone with sorters or boxes for papers to be processed.  

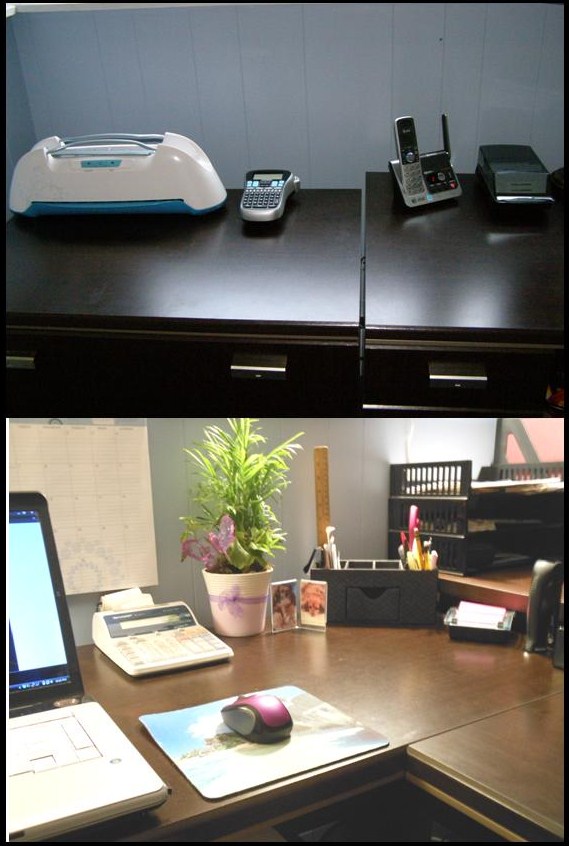
ASSIGN EVERYTHING A HOME: Immediately assign all items a home when they come to your desk: papers to be processed should go to the in-basket, books to the reference area, messages to the phone area, data to be inputted to the computer area, etc.  This technique will help direct your workflow and cut down on the number of undefined piles that can accumulate.clear office desk

These ideas should be easy to accomplish and yield you great results in a short amount of time … a clear, working desk area.  Now take some time to sit at this clear desk and imagine all the creativity that will flow!  Check back for more tips to an organized office in our next blog.