Archives

5 Simple Steps to Organize Your Shed


What does your shed look like right now?

If you were to open the doors to your shed, what would you find?  Would you be able to find things quickly and easily?  Are all of your tools/equipment in good working order?  Are you ready to put away your outdoor items and get ready for the upcoming season?  Chances are that is not what you can do, but you are not alone!  My shed was once like that, too, and so are many of my clients.  In just one day and 5 SIMPLE STEPS, I was able to organize mine so that now I CAN do the above things, quickly and easily.  You can too!

I’ve created a short (just 8 minutes) slide presentation detailing the 5 Simple Steps that you can take to create the shed of your dreams! So,


STOP jumping over piles to find what you need,


digging deep for what you want

or buying unnecessary items because you can’t remember what you have! 


END THE FRUSTRATION & OVERWHELM TODAY

AND CREATE THE SHED OF YOUR DREAMS!

Organized, Efficient & Easy to Use

CLICK HERE

 to view the slide presentation.


8 Simple Steps to Organize A Garage

Do you find that your garage has become a dumping ground and you can’t even remember its intended purpose?  Have you thought about organizing it, but quickly gave up the idea because it was too overwhelming?  You’re not alone.  There is a way to tackle the project easily – break it down into manageable steps and work on them one by one.  Read on for some tips on how to accomplish those steps.

 PREPARE FOR THE RIDE: Check out the weather so you can pick a date that works well with your schedule; commit to the project by marking it on the calendar.  Assemble supplies you will need: plastic garbage bags, cleaning solutions, gloves and a dust mask top the list.  Make sure you have easy-to-grab food on hand and lots to drink so you can keep yourself nourished.

 DIVE INTO THE SORT: The easiest way to sort is to bring it all out; utilize your driveway or backyard for the sorting.  Create sorting zones with a pile for Keep, Donate, Move Elsewhere and Toss.    Remove the largest items first, work your way through the rest and tackle small items last. 

 CLEAN IT OUT:  Pull on the gloves, put on the mask, then clean it all out … get in there with some elbow grease to dust, sweep, wipe down walls and prepare your space for its transformation.  Don’t skip this step…think of it like a blank canvas that is being prepared for a beautiful painting.

  TIME TO DISPOSEDispose of the trash, move out the items going to another area, send the give away items to their homes and you are left with only the items to be returned to the garage.  Group like with like and categorize the items left (sports, decorations, gardening, tools, etc).

 PLAN IT OUT: Sit in the cleaned space and evaluate what is to be returned.  Determine how you wish to store it and decide if you will use shelving units, stock storage systems or call in a company to customize the space.  Sketch out a floor plan for your reference and note measurements for any storage systems/containers to be purchased.  (Remember – measure twice to purchase only once!) 

  FINDING A NEW HOME:  Utilize all of your space efficiently.  Shelves are a great way to store large items & local home improvement stores have many storage systems available.  Plastic bins are good for small items, hanging racks are great for sports equipment and bikes can be hung well from the ceiling. 

 DIVIDE & CONQUER: Create zones in the garage for the categories of items you have and clearly define these zones with labels.  Make sure to factor in visibility and access: frequently used items should go in easy to reach places up front; permanent storage items in less accessible places in back of the garage.  Return the sorted items to their zones.

 KEEP UP THE MOMENTUM:  Once you’ve created your ordered space, adopt new habits to keep it orderly: take a few extra minutes each day to put items in their designated spots and schedule weekly cleanups. These will be a breeze now that everything has been organized!

Conquering the clutter in your garage and creating an organized space can be a simple and easy process if you break it into manageable steps.  Check out our Photo Gallery and see how one of our clients tackled her project in 8 hours!  Once you’ve finished the garage, what’s the next space going to be?  Drop us a line and let us know – we’ll be able to give you some tips on organizing that area too!


SUMMER SERIES: Organizing to Travel – Post 3 of 3

 A Handy Checklist for Getting Your Car Ready to Travel

Labor Day, a holiday that typically signals the end of the summer season, is just around the corner for those of us in the United States. There is still a lot of time to enjoy some travel adventures even if the calendar says it’s the end of the summer! This might even be a good time to take a road trip and enjoy the beauty of late summer or the upcoming fall weather. Before you head out on the road, though, it’s important to make sure your car is ready to travel to ensure a safe and smooth journey. Here is a handy checklist to cover all the basics.

√ Check the Pressure: Poor tire pressure can lead to a rough ride or even a blowout! Use a pressure gauge to make sure all five tires (that includes your spare) are at the same level. Maintaining proper pressure can also reduce fuel costs by up to 3% (according to AAA).

√ Check the Fluids: This check should include the oil, wiper fluid, brake fluid and coolant.  The car manual should include how-to instructions if you want to tackle it on your own; if not, take it to your local automotive shop for a check. Having the fluids well filled will reduce the chances of engine failure or overheating during your journey.

√ Check the System: Make sure there are no warning indicator lights displayed on the dashboard. Refer to your manual for definition of each one and take to your local repair shop to clear before setting out on the road.  Making sure your system is in order will lessen any worries about car performance while on the road.

√ Check Windshield Wipers: Blades that are worn, cracked or aged will not remove rain, dirt or other debris and can hinder a driver’s vision. Ensure that wipers are new or in good condition and replace frequently to maintain the best visual space for the driver.

√ Check Maintenance: Regular maintenance should include a tune up, changing the oil, checking the cooling system, testing and/or recharging the air conditioning and replacing the air filter. Schedule a maintenance at least 1-2 times a year with your local automotive shop if you are not comfortable completing these tasks on your own.

√ Check the Glove Compartment: A glove compartment should always include up to date registration & insurance information, contact information, map, owners’ manual, batteries/chargers for electronic devices, tire pressure gauge, and a pen & pad.  These items could be essential when traveling.

It’s always a good idea to have at least a basic emergency kit on hand to help you through an unexpected emergency. Check out our Resources tab for suggested kits or a list of items for assembling one of your own.

Now that you’ve gone through this simple checklist, you should feel confident that you’ve greatly reduced the chance of having any issue while on the road.  You are now ready to pack up your car, hop on the highway and get on out there to your destination!   Happy traveling!


SUMMER SERIES: Organizing to Travel – Post 2 of 3

8 GREAT TIPS TO PREPARING YOUR HOME FOR YOUR DEPARTURE 

The summer is the quintessential time to travel and get away from home. A lot of things need to happen before you set out to travel, though.  Preparing your home for your absence should be incorporated into your preparation plans for the trip to ensure a smooth departure.  The best way to accomplish this is to create a checklist to follow; having a checklist will make the preparations so much easier and keep you on track to completing all that needs to be done.  Here are some great tips to quickly and easily prepare your home for you to leave. Let the preparation begin!

  1. LET IT BREATHE: Make sure to ventilate your home while you are away.  If your space is centrally air conditioned, turn the thermostat to 78° F/29° C to save energy, keep the space at a comfortable temperature and avoid the ill effects of a hot, sticky home.  If you have window unit air conditioning or none at all, open a few windows on each level about 2” to let air circulate throughout the space; make sure to block the windows from the sill or close the locks to keep anyone from entering.
  2. KEEP IT SECURE: Stage the house to look like someone is still there if you are going away for more than a few days: arrange for the mail/newspaper to be held, picked up or temporarily stopped, the garbage cans to be brought in and hook up lights and tv to a timer set to randomly turn on and off.  Most importantly, make sure you store any valuables in a locked, safe place or move them to a secure location.
  3. GIVE OTHERS ACCESS: It’s always a good idea to give your house key, itinerary and emergency contact information to a trusted neighbor, friend or family member so they can access your home in case of emergency (flood, fire etc.).
  4. POOL SITTER: If you have a pool, it’s always a good idea to keep the filter running during your absence so that there aren’t any water problems when you return.  If you don’t have someone to come in and turn the filter on each day, attach the pump to a timer to ensure it runs regularly and doesn’t turn the water that icky color green!
  5. KEEP THAT GARDEN ALIVE: If you have a garden, it’s best to hire someone to keep it watered during your absence.  If you don’t have anyone to do this, try snaking a hose with holes throughout the beds and turn it on very low so the flowers can be kept moist.   Water-filled globes are also great to leave in your flower boxes or planters so they can stay watered too.
  6. CLEAN OUT THE FRIG: Try to eat most of the food in the refrigerator during the days before you depart.  Clear out the leftovers, wipe the frig clean and empty the indoor trash can so that food does not perish in your absence.
  7. DON’T LEAVE IT TO BURN: Remove potential fire hazards: unplug televisions, computers and small appliances if you don’t have them attached to a power surge strip.  Summer is notorious for flash storms and you wouldn’t to want to lose your electronics to a freak lightening strike.  Also, check to make sure the stove/oven knobs and your gas valves are turned off just before leaving your home.
  8. HANDLE THE MONEY: Make sure you check your bill schedule and plan to pay any bills due during your absence ahead of time by pre-scheduling online payments or leaving the mailing with someone you trust.  Most importantly, don’t leave any banking information easily accessible in your home. You’ll be able to enjoy your time away if your financial responsibilities are well taken care of during your absence.

Now that you’ve got a better idea of what needs to be done to leave your home and how quickly and easily you can accomplish the preparation, it’s time to go!  Pack your bag, complete your checklist and get ready for take-off.  You will soon be on your way to a relaxing and enjoyable time away once you have prepared yourself AND your home for your departure!

Make sure you drop us a line and let us know how your adventure went….happy traveling!

SUMMER SERIES: Organizing to Travel – Post 1 of 3

8 EASY STEPS TO PREPARE YOURSELF FOR DEPARTURE

Lately, my inbox has been flooded with emails for travel destinations and a myriad of travel products.  This doesn’t surprise me since summer seems to be the quintessential season to travel.  But have you ever felt like preparing to depart makes you too exhausted to even think about going on a trip – I sure have!  If you find yourself losing time preparing for your trip, your stress level skyrockets and you dread traveling, read on for eight, easy steps to solve this problem!

LIST IT OR LEAVE IT: Create a packing list in advance; a packing list will help you to remember what you need to take, prevent you from taking too much and keep you on track.  Think of it as the blueprint for your trip!  Create a master list by writing down all of the things you could possibly need for your trip and review it after each trip to refine it for the next.  After all, you should always pack what is on your list, but you should never pack what isn’t on your list!

CORRAL THE CONTAINERS: Don’t get caught with broken luggage just before packing.  Gather the luggage you will be using ahead of time and check it for holes, rips or broken closures; repair or replace if needed.  Save time and eliminate pressure by setting your luggage out and open in an easy to reach place.  When you come across something you want to take with you, just pop it into the appropriate bag and it’s one less thing you have to remember!

MAP IT OUT & TEST DRIVE: Take the time to lay out what you will wear so you can assemble outfits and accessorize ahead of time.  Once your outfits are all put together, pack it in the luggage that is open and waiting.  You’ll eliminate the last minute decision making that causes so much stress by taking your clothes for a test drive.   Remember that comfort should always come first and sticking with a color theme makes it easier to mix and match with less pieces.

ADD A SPECIALTY BAG: Try using a toiletry bag inside your luggage.  Purchase sample bottles to store your hygiene, makeup or shaving items and put in a hanging bag – smaller, sample sizes saves space and can easily be replenished after your trip.  An extra bonus:  you won’t have to unpack the items individually – just remove the bag from your suitcase and hang it up….more time for you to play!

DON’T FORGET THE MEDICINE: Don’t be caught without your prescription medicine during your travels.  Review all medicines that you will need to take ahead of time, refill any prescriptions and store them in the original containers.  Always keep your prescription medicine with you at all times.  DO NOT pack them in the checked luggage – it’s a good idea to keep them in a clear, sealed bag in your purse or carryon bag.

FIRST AID TO THE RESCUE: It’s always a good idea to take a portable, first aid kit with you when traveling.  This kit can range from a simple assortment of Band-Aids and antiseptic in a travel size pouch to an insulated, lunch bag containing commonly used over the counter medicines and a larger selection of first aid accoutrements.  It can certainly save you a late night trip to a drugstore that might be far away if you get a particularly nasty sunburn or bee sting!

BRING THE GOODY BAG: It’s always a good idea to have an activity bag that you pack with special things to keep you busy when traveling – there’s always a delay somewhere!  If you have children, create a toy bag or backpack that you use only when traveling – this will make the items seem “special”.  Fill it with small, easy to use items including books, colored pencils and small toys.  A goody bag doesn’t just apply to the kids – get creative and make an adult version!

WHO AM I & WHERE AM I GOING: Make sure that you keep your id, credit card, cash and travel information on you at all times.  A small wallet portfolio is great for keeping this information together and a check size accordion file is great way to store it if you are traveling by car.  You could use your phone as a file cabinet, too, for all of your details: leave yourself a message, put the trip details into a text or store it in a password protected document.

As you can see, getting ready to depart doesn’t have to take a lot of time, create undue stress or make you dread your journey.  Your trip can be fun and create lasting memories if you follow the above eight, easy steps.  So go on, dream away and find that fantastic place to travel to this summer….you’ll be able to get ready in no time.

As always, drop us a line and let us know all about your adventures – we’d love to share them with our visitors.   Happy traveling!


5 Simple Steps to Organizing Your Pocketbook – in under 1 Hour!

THE POCKETBOOK: Gatekkeeper to a Woman’s Life

The other day, a friend of mine asked me for advice on organizing her pocketbook; I gave her some basic tips and she went on her merry way.  Her question, however, stayed with me as I pondered the important role this fashion accessory now plays in a woman’s life. Although it may seem fairly simple, organizing a woman’s pocketbook can be as complex as creating world peace!  After all, the pocketbook is the keeper of the equipment of our daily lives and it serves both in a carrying capacity and as a fashion accessory that is constantly evolving as our lives change.  No wonder it’s as complex as world peace!   

Here are five simple and easy tips to organize your pocketbook quickly and painlessly no matter what role it plays in your life.  And it shouldn’t take more than an hour – how great is that?  

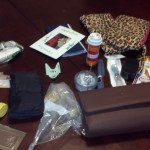
1. PURGE THE OLD TO MAKE WAY FOR THE NEW: I  use a very unique method to do this; it’s called -: dump & discard!  Dump everything out and discard all the old, crushed or no longer usable items you find. 

2. SORT OUT THE MUST HAVES: Keep only what you MUST have to function in a day. Group the like items into categories such as finance (your wallet), medical (medicine you have to take), office (paper/pencil), Cosmetics (pare down to just one lipstick), etc.  Once you have an idea of what you need to store in the pocketbook, you will be able to purchase one that will hold everything you need.

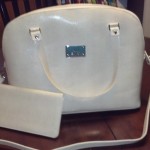
3. CHOOSE A NEW POCKETBOOK WISELY: As with most things, choosing the right tool is essential to organizing your pocketbook quickly.  Find one that will hold all of your sorted must haves and has a good amount of pockets, both inside and out.  (I often take the contents of my pocketbook with me when shopping – then I know exactly which size to buy.)  I always recommend one keeps in mind the need for expansion when purchasing any new tool.  So if you have a lot of everyday items needing to be stored, don’t buy that cute, little clutch that is showcased in the window – buy the larger one with the sturdy strap on the shelf! 

4. CONTAINERIZE: If you have a bag that does not have many pockets, you are not doomed to throw it away.  Purchase inexpensive cosmetic bags to contain the items.  (Look for discounts at your favorite clothing store such as www.burlingtoncoatfactory.)  You can buy clear bags or use different sizes to help you identify contents quickly and easily.

 5. REPACK YOUR BAG: Once you have purged, sorted and containerized, repack your bag with the mindset that everything has a place and there’s a place for everything.  Based upon your personal style, decide where things would most easily be retrieved and store them in that section of the bag.  And don’t store too many items in one pocket!

If you followed the simple, easy steps above, you should now have a neat, organized pocketbook that is sized to meet your everyday needs.  Think of the time and effort you will save every day when you are able to quickly and easily retrieve any of those important items you carry around to live your life.  Happy organizing!